Displaying The Landingpage
- Former user (Deleted)
- Former user (Deleted)
- Former user (Deleted)
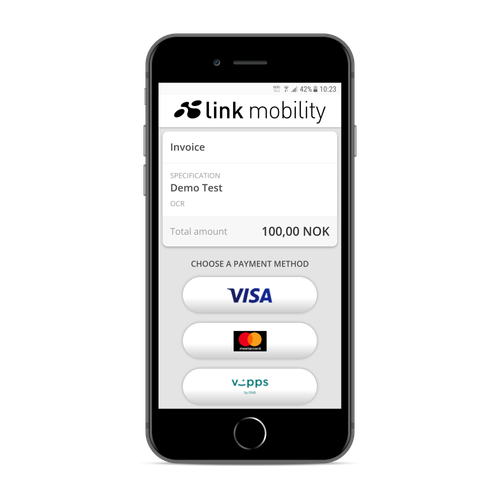
Displaying the landingpage that will be sent to the user from a Pre-Transaction
After you create a PreTransaction by using POST pre-transactions, you will get a HTTP Location header in the reponse with the URL to the newly created PreTransaction Resource.
Example: https://pay-core.linkmobility.com/api/pre-transactions/<PartnerId>/<PreTransactionId>?api-version=2.0 . You use the GET pre-transactions method of the API to see resource information.
To see what the landingpage for this PreTransaction will look like for the user, you take the PreTransactionId from the Location header (see example link above) and make the following request:
Method: GET
URL: pay-core.linkmobility.com/pre-transactions/<PartnerId>/<PreTransactionId>
A shortened version of this URL is inserted into the "template" field {{paymentSelectionPageUrl}} if you included that in the SmsNotificationText for the POST pre-transactions method.
For Vipps and Swish payment you can skip the landing page if you enter(select) ONLY one of them in PaymentProviders and set the flag SkipLandingPage to true (check the checkbox in the sending of the Invoice)
Example SMS:
Thank you for your order. Please click on the link below to choose payment method.
http://pay-core.linkmobility.com/5X6Y7Z
Example page:
If your user has already completed a payment, either successfully or not, then this page will not let you create another Transaction. This can happen if the user goes back with their browser or hits the link from the SMS again at a later time. Trying to choose Payment method again will then result in a HTTP response status of 401 Bad Request with the following XML message:
<string xmlns="http://schemas.microsoft.com/2003/10/Serialization/">Pre-transactions has already been processed and previous card transaction failed.</string>
Related content
Feeling lost? Click on this link! Portal page